Behind the Scenes in Durdle Door
Welcome to the first episode of Behind the Scenes, where you’ll learn how I took the photos on location, to help you improve your own photos.
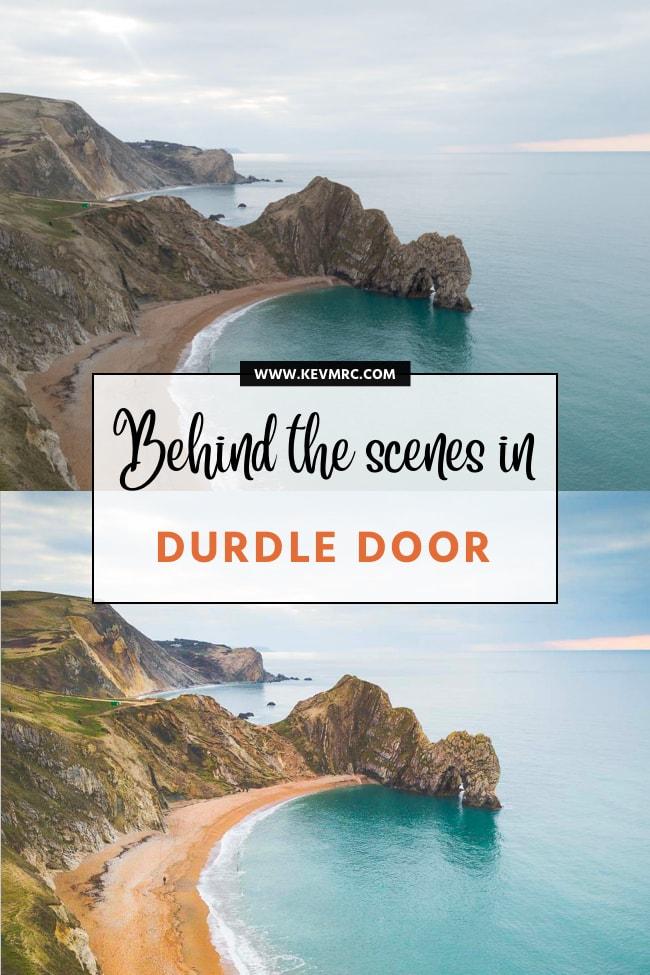
TABLE OF CONTENTS
The Behind the Scenes Concept
If this is the first episode of Behind the Scenes you’re reading, let me share more about the concept of the series, and what you can expect to find in each episode.
As the title suggests, in the Behind the Scenes series I will share with you the behind the scenes of how I took the photos on location.
Whenever I travel and take photos, I share stories with you about the place, the hikes, travel guides, and photo series. As my biggest goal is to help you learn photography easily, I want to take it one step further and share the behind the scenes details of how I took the photos you can see on the blog, in the other articles (photo series or travel guides).
Location
Each episode will be the behind the scenes for a specific location. For example, behind the scenes of Durdle Door, England ; or behind the scenes of Algarve, Portugal.
Photos
I will select 3 photos for each destination. The 3 photos will be as diverse as possible, to give you the widest range of behind the scenes info.
Camera Gear
In this section you’ll find the camera gear that was used to capture the picture: camera body, lens, and optional gear used (tripod, filters, props, …)
Camera Settings
I will share with you the exact camera settings I used to capture the image: aperture, shutter speed and ISO.
Composition
The most important part of the photo to me is composition. In this part I will discuss what went through my mind when taking the photo, how I planned the shot, and how I composed my image.
Raw Photo
For each photo, you will see the raw image, straight out of the camera, with no edits.
Before/After
To give you an insight on the editing process, you’ll see a before/after for the image.
Editing
Finally, we will look into the post-processing work done on the image, to take it from the raw photo to the finished image.
Now that you know what to expect from this Behind the Scenes Series, let’s jump into the Durdle Door Behind the Scenes episode.
Behind the Scenes in Durdle Door
If you missed my Durdle Door photos/guide, you can find them here:
Durdle Door Travel Guide
Durdle Door Photo Series
Let’s get started on the first image.
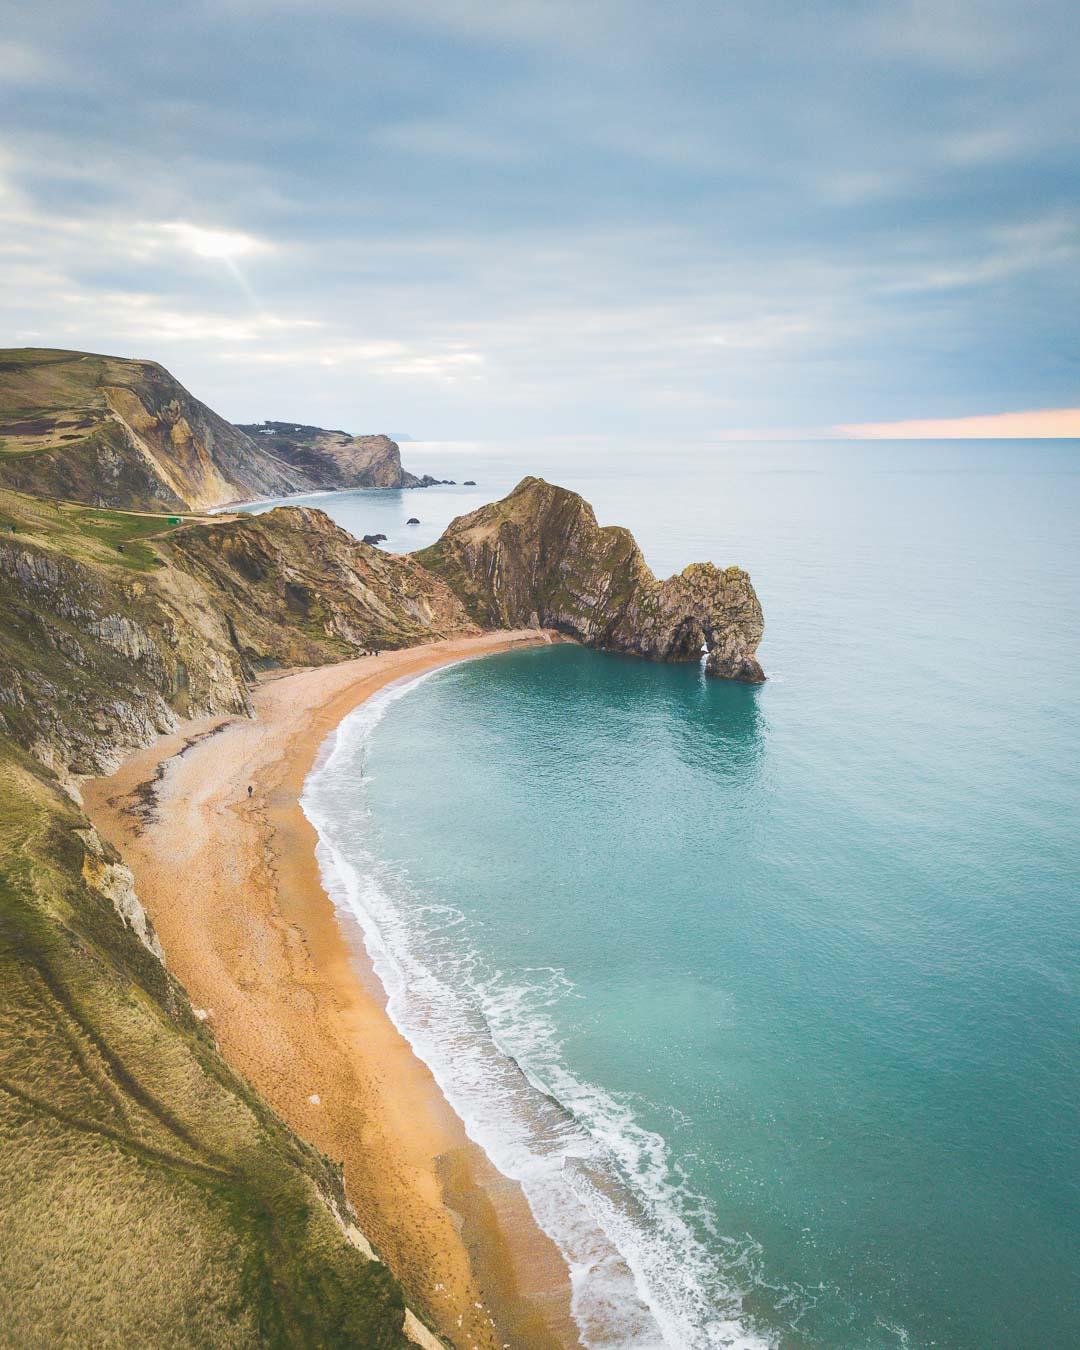
#1 Durdle Door image
Finished Image
Here’s the first final image taken at Durdle Door that we will look at:
Camera Gear
This shot was taken with:
Camera: DJI Mavic Pro Drone
Lens: Default built-in lens
Tripod: /
Filters: none
Camera Settings
Here are the camera settings I used for this image:
Focal Length: 26mm (default on mavic pro)
Aperture: f/2.2 (default on mavic pro)
Shutter speed: 1/240th sec
ISO: 100 ISO
Composition
I went for a very clean and simple composition on this one. I positioned the sky on the upper line of thirds, and I made sure to include the cliffs on the left side of the image, to frame to nice curve of the beach.
The composition in Durdle Door works well naturally, with the beach acting as a leading line, leading your eye from the bottom of the frame all the way to Durdle Door.
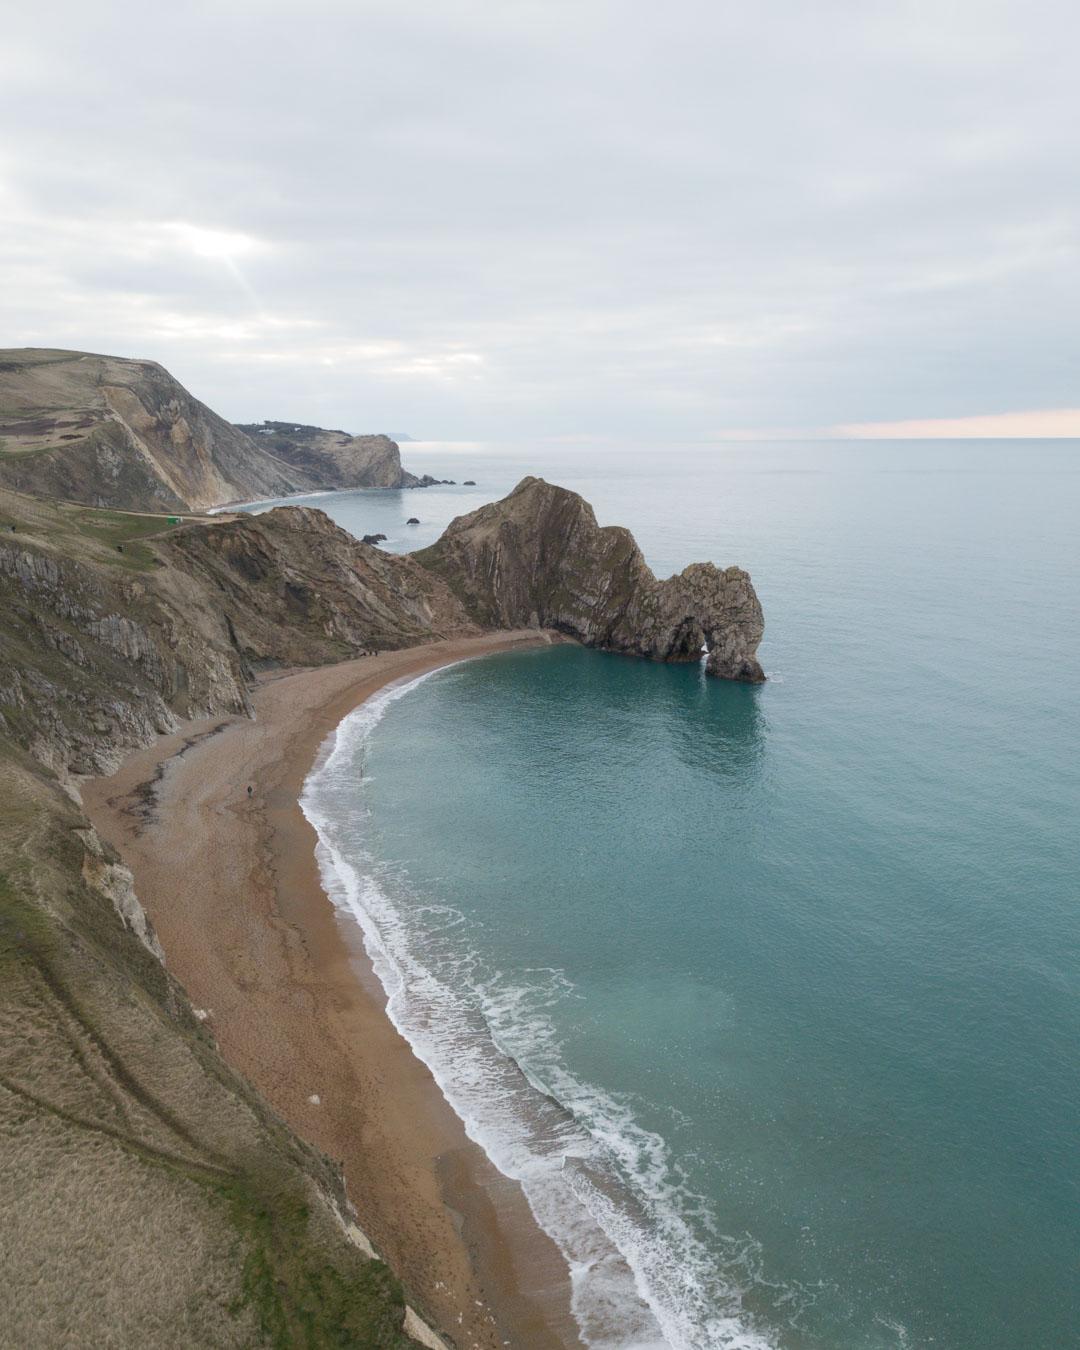
Raw Photo
You can see below the image straight out of the camera.
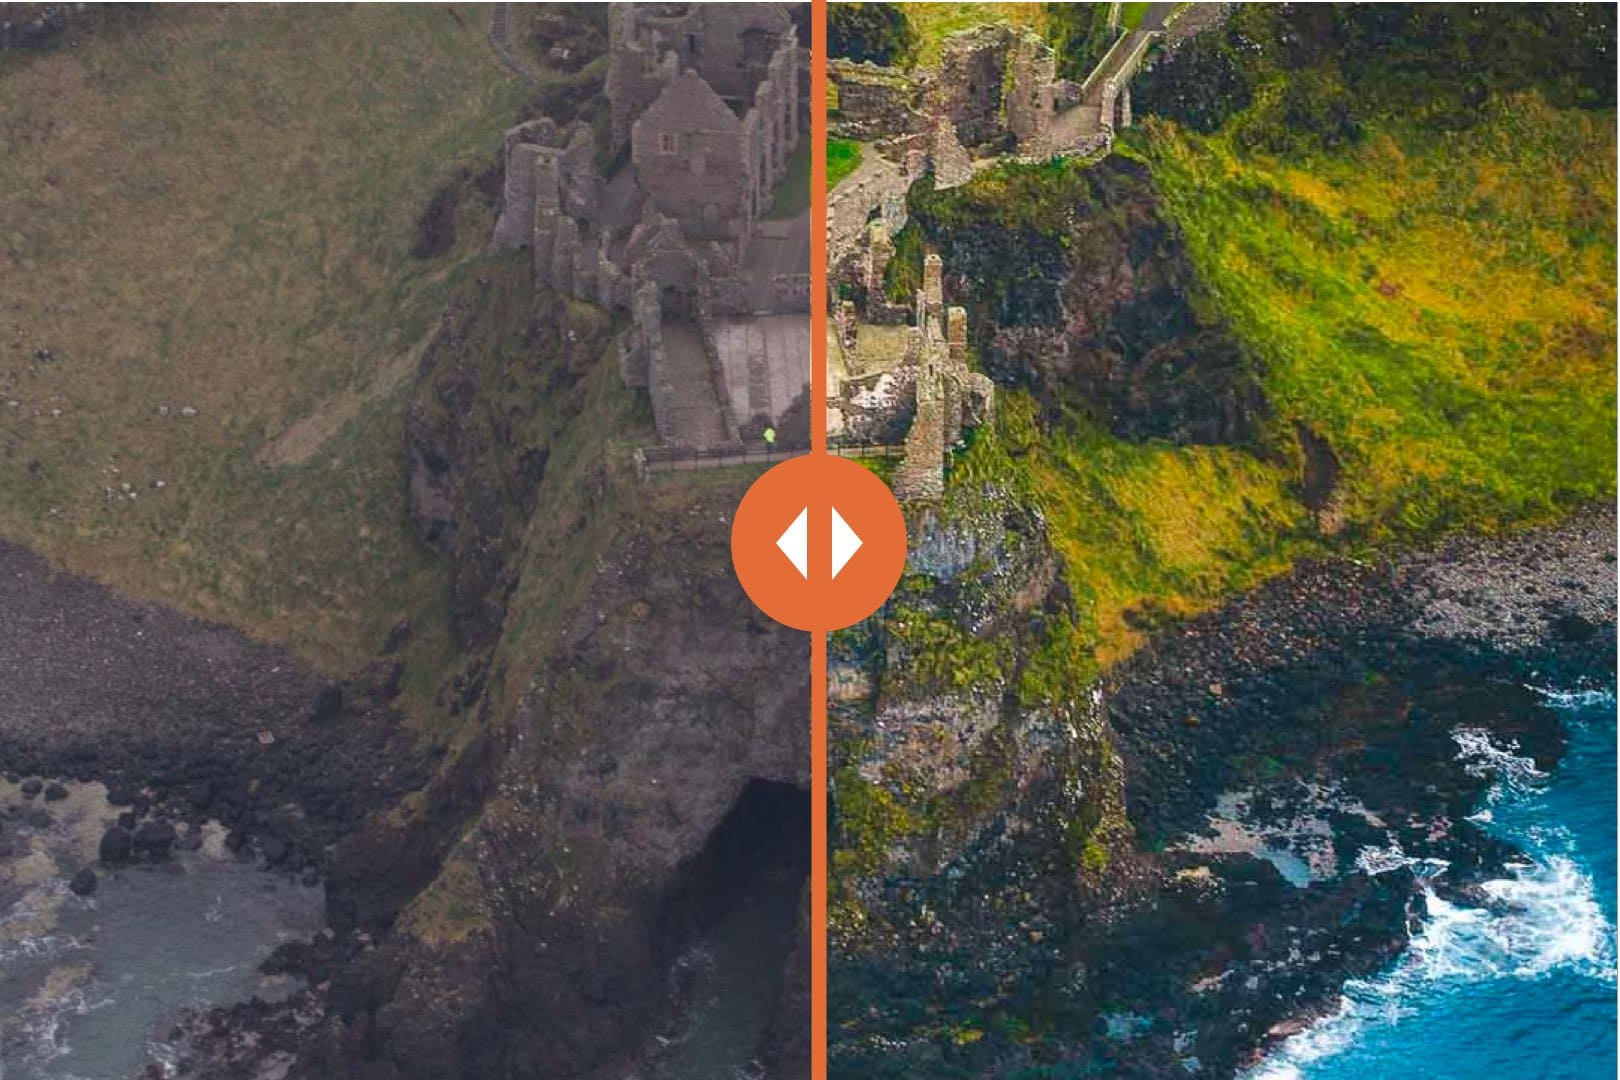
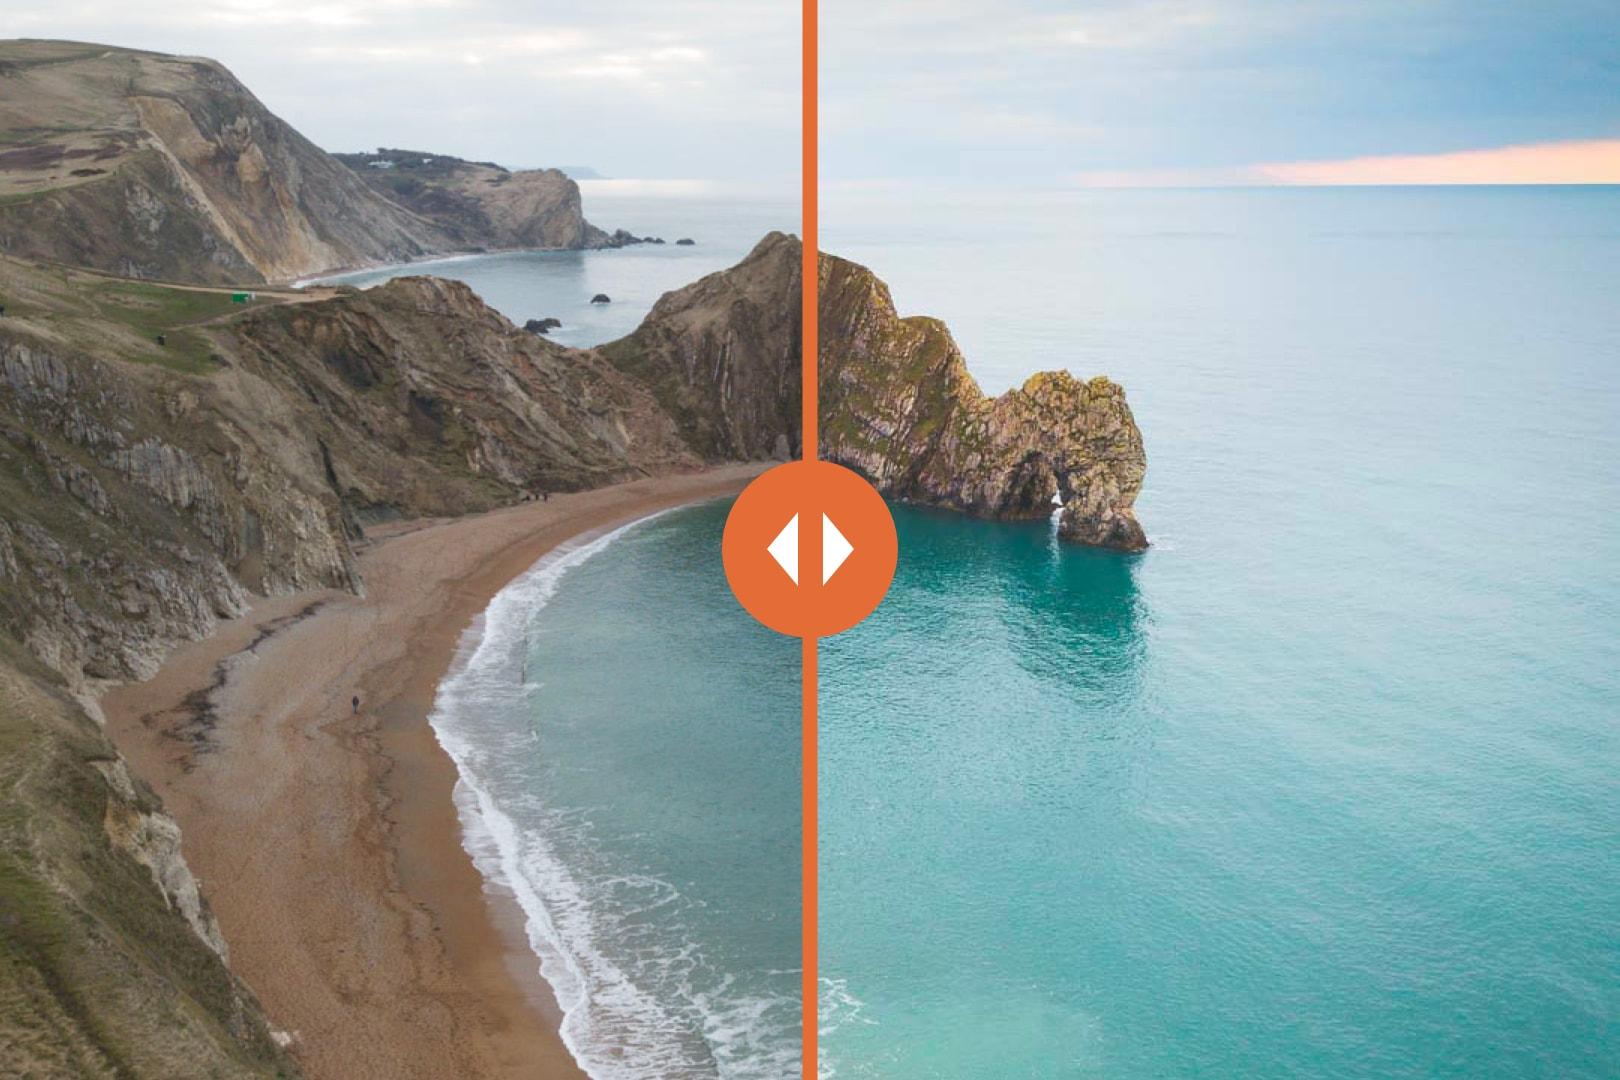
Before/After
Tap on the photo to see the before/after
Editing
When editing this photo, I decided to go for a warm and clean edit.
I pulled the shadows to make the beach, the cliffs and Durdle Door brighter.
I increased the saturation a bit to make the colors pop.
Then I used local adjustments:
-I brushed the beach and warmed the white balance
-I brushed the waves and increased exposure to make them whiter
-Then I used a graduated filter on the sky, and decreased the highlights while increasing the whites to make it moodier
#2 Durdle Door image
Finished Image
Here’s the second final image that we will look at:
Camera Gear
This shot was taken with:
Camera: Canon 6D
Lens: Tokina 16-28mm f/2.8 Pro FX wide-angle lens
Tripod: none
Filters: none
Camera Settings
Here are the camera settings I used for this image:
Focal Length: 16mm
Aperture: f/9.0
Shutter speed: 1/125th sec
ISO: 125 ISO
Composition
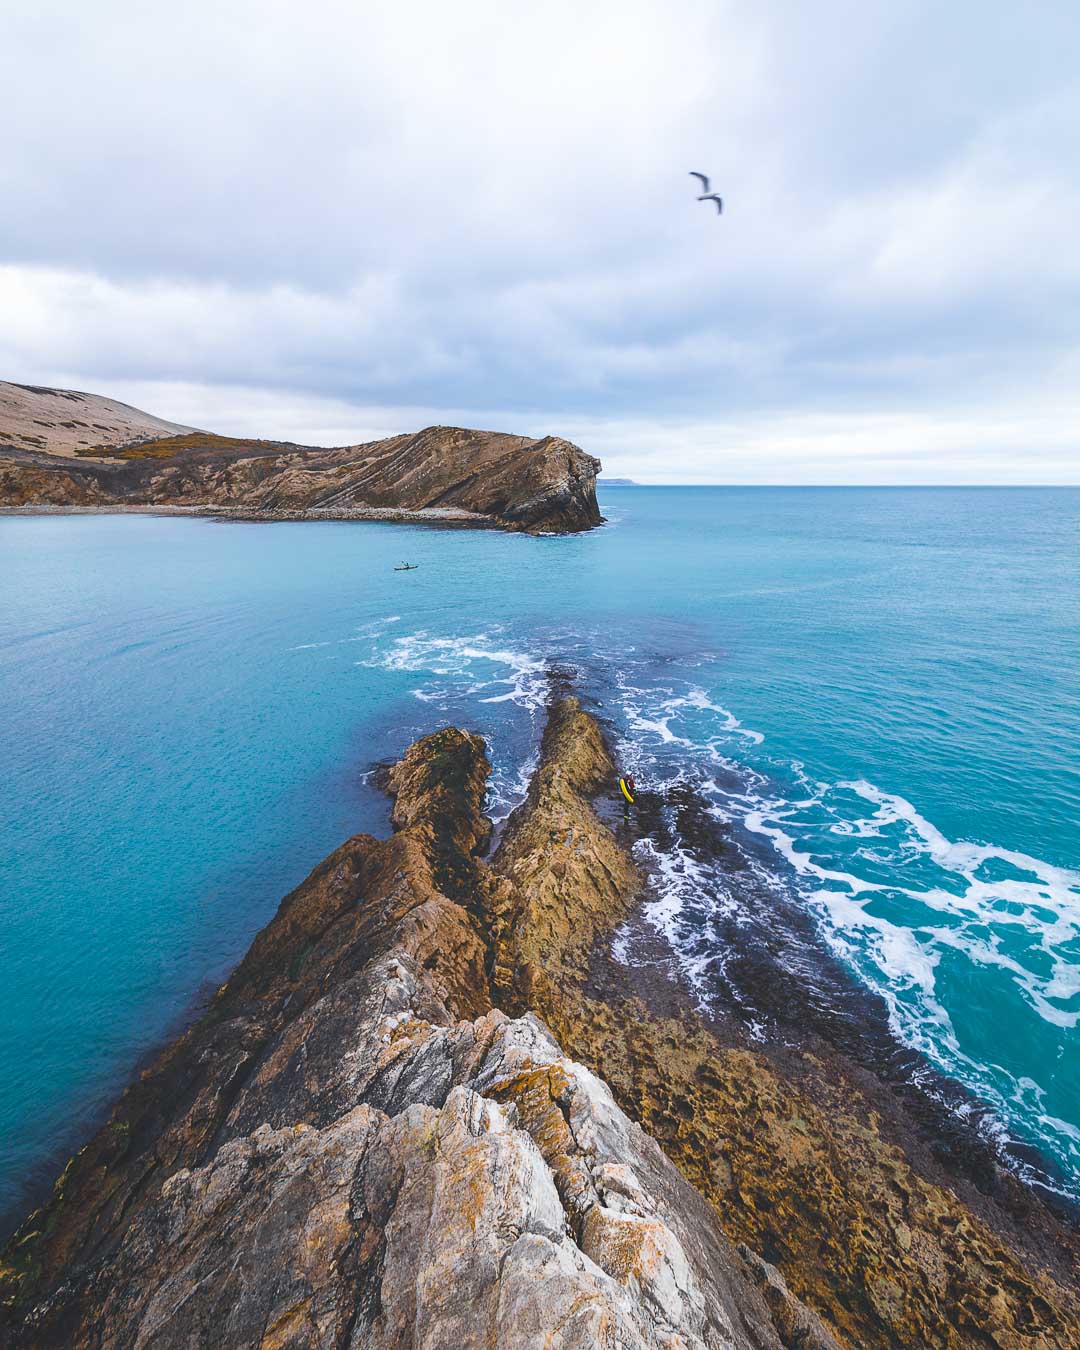
Again, the composition here was pretty straightforward: I placed the lines of the cliffs in the middle of the shot; they lead your eye to the other cliff across the sea. I placed the sky on the upper line of thirds.
I then waited for a bird to fly in the frame, and pressed the shutter.
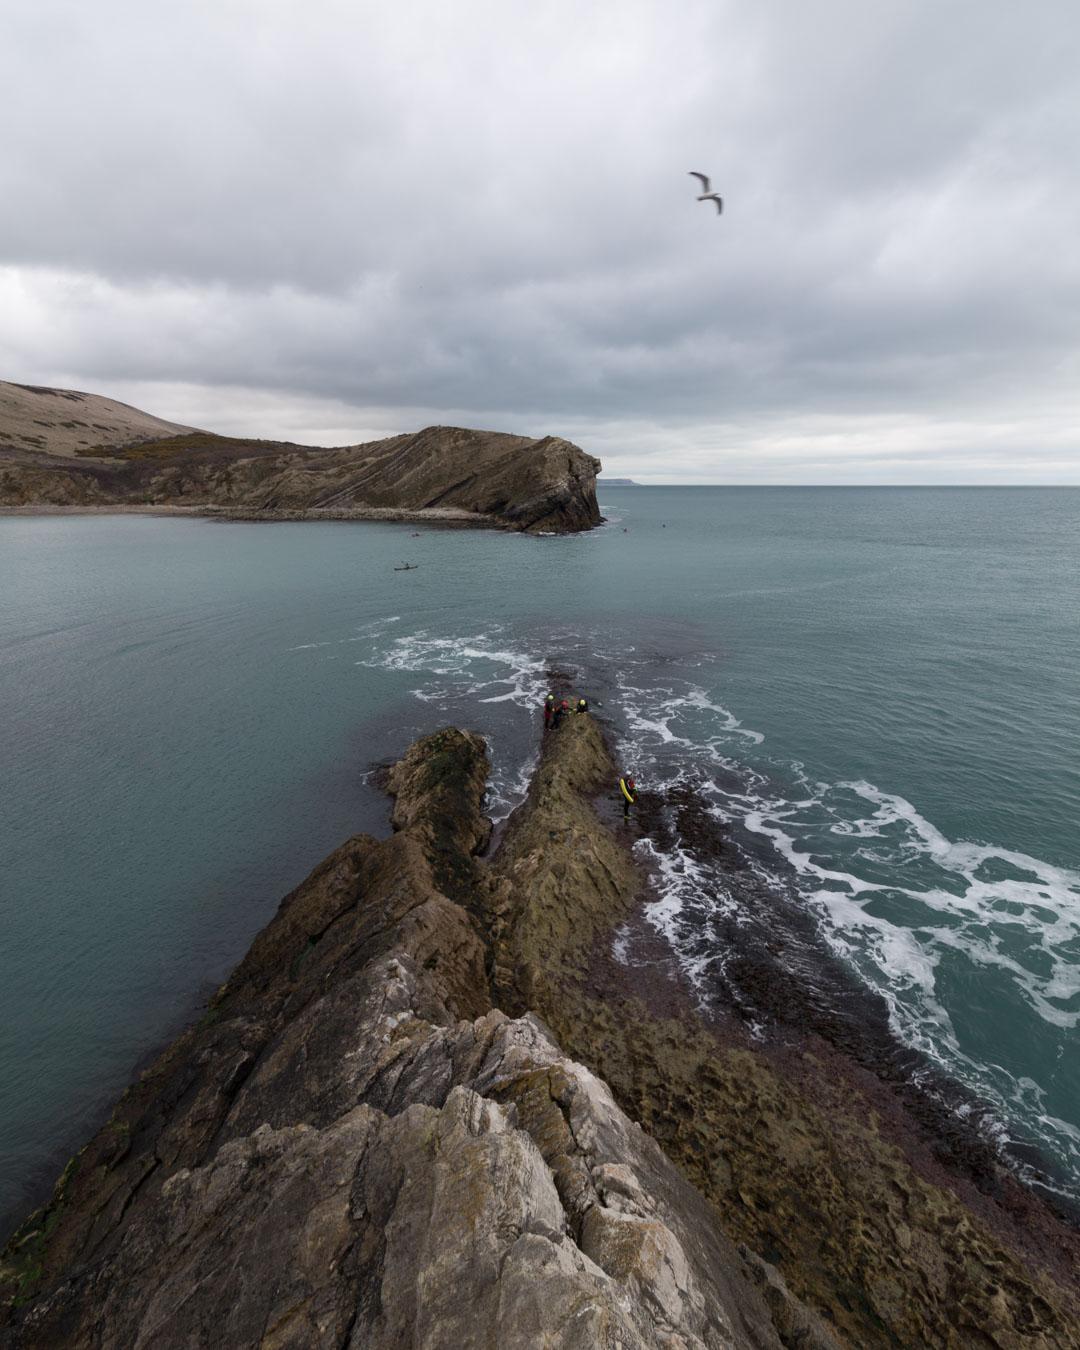
Raw Photo
You can see below the image straight out of the camera.
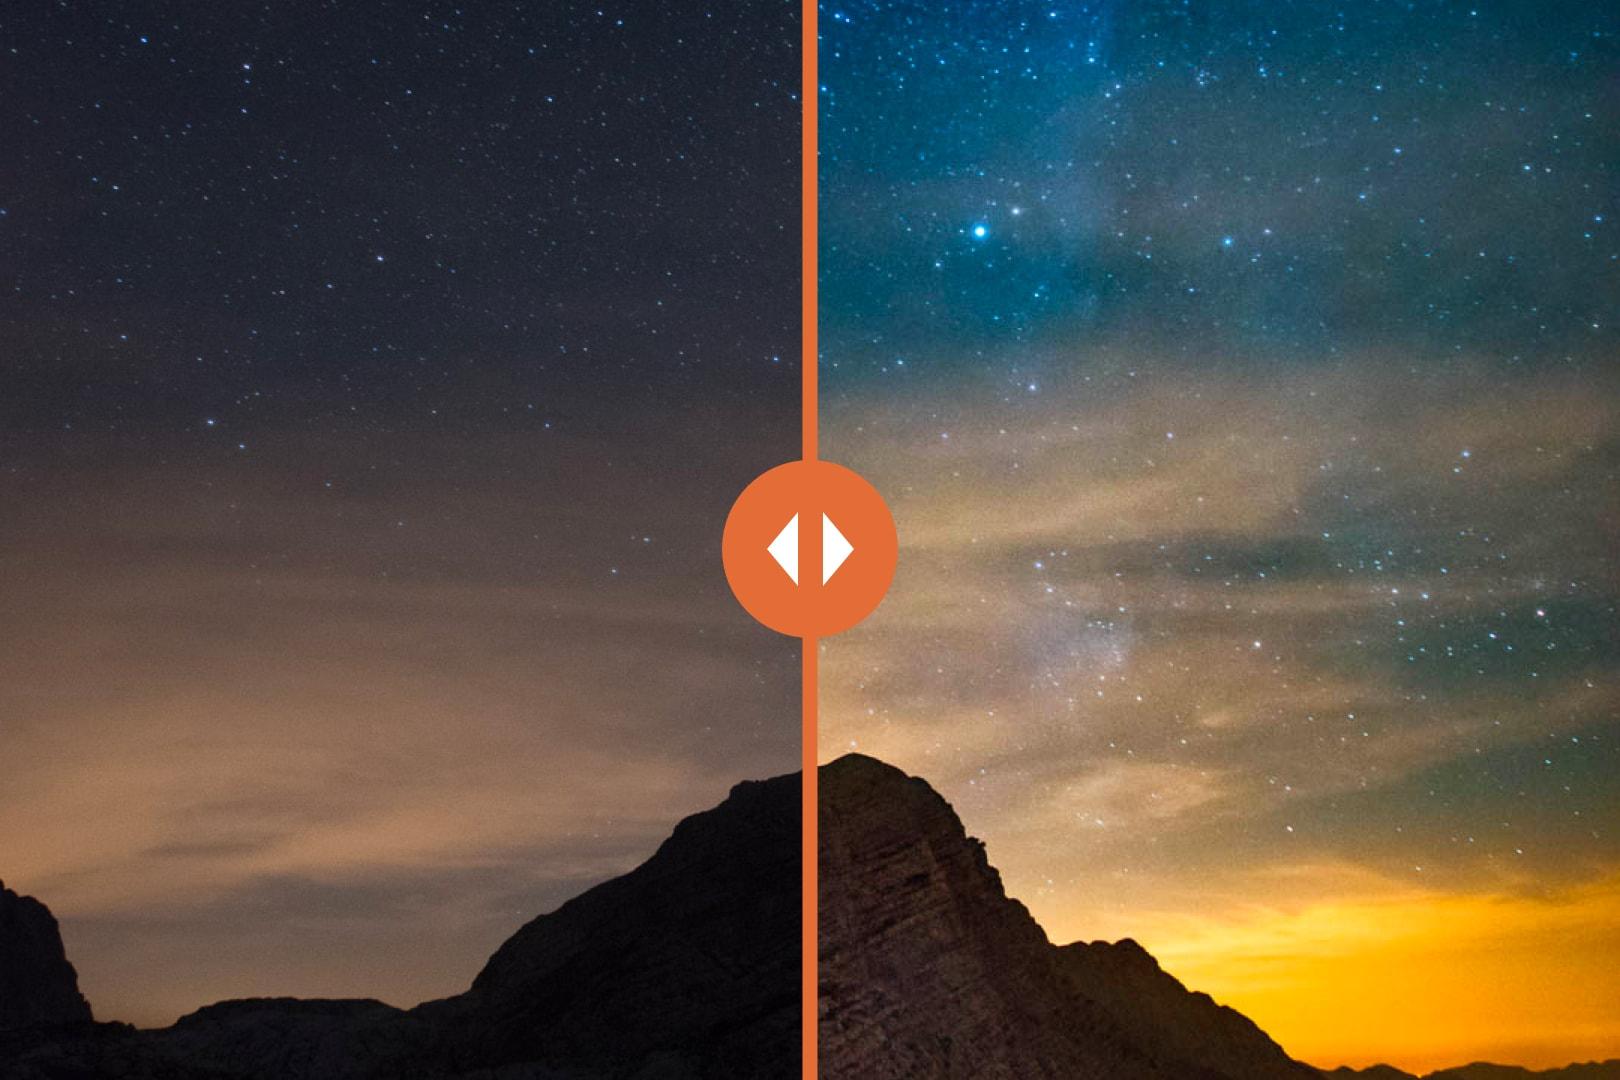
Before/After
Tap on the photo to see the before/after
Editing
Not much editing was needed on this one. I pulled the shadows and increased the exposure to make it pop, then increased the saturation to get the blue water.
I finished the image by removing the 3 divers in the middle of the frame, leaving only 1 diver, because I think he adds to the shot and tells a story.
In the end, I also removed a few buoys in the water, to make it cleaner.
Do you want to learn how to take photos like these? You can start by checking my free 24 pages ebook on mastering digital photography basics: download the eBook for free!
#3 Durdle Door image
Finished Image
Here’s the last final image taken at Durdle Door that we will look at:
Camera Gear
This shot was taken with:
Camera: Canon 6D
Lens: Tokina 16-28mm f/2.8 Pro FX wide-angle lens
Tripod: Davis & Sanford TR553-P228 Traverse Super Compact Tripod with Ball Head
Filters: none
Camera Settings
Here are the camera settings I used for this image:
Focal Length: 18mm
Aperture: f/20
Shutter speed: 1/5th sec
ISO: 100 ISO
Composition
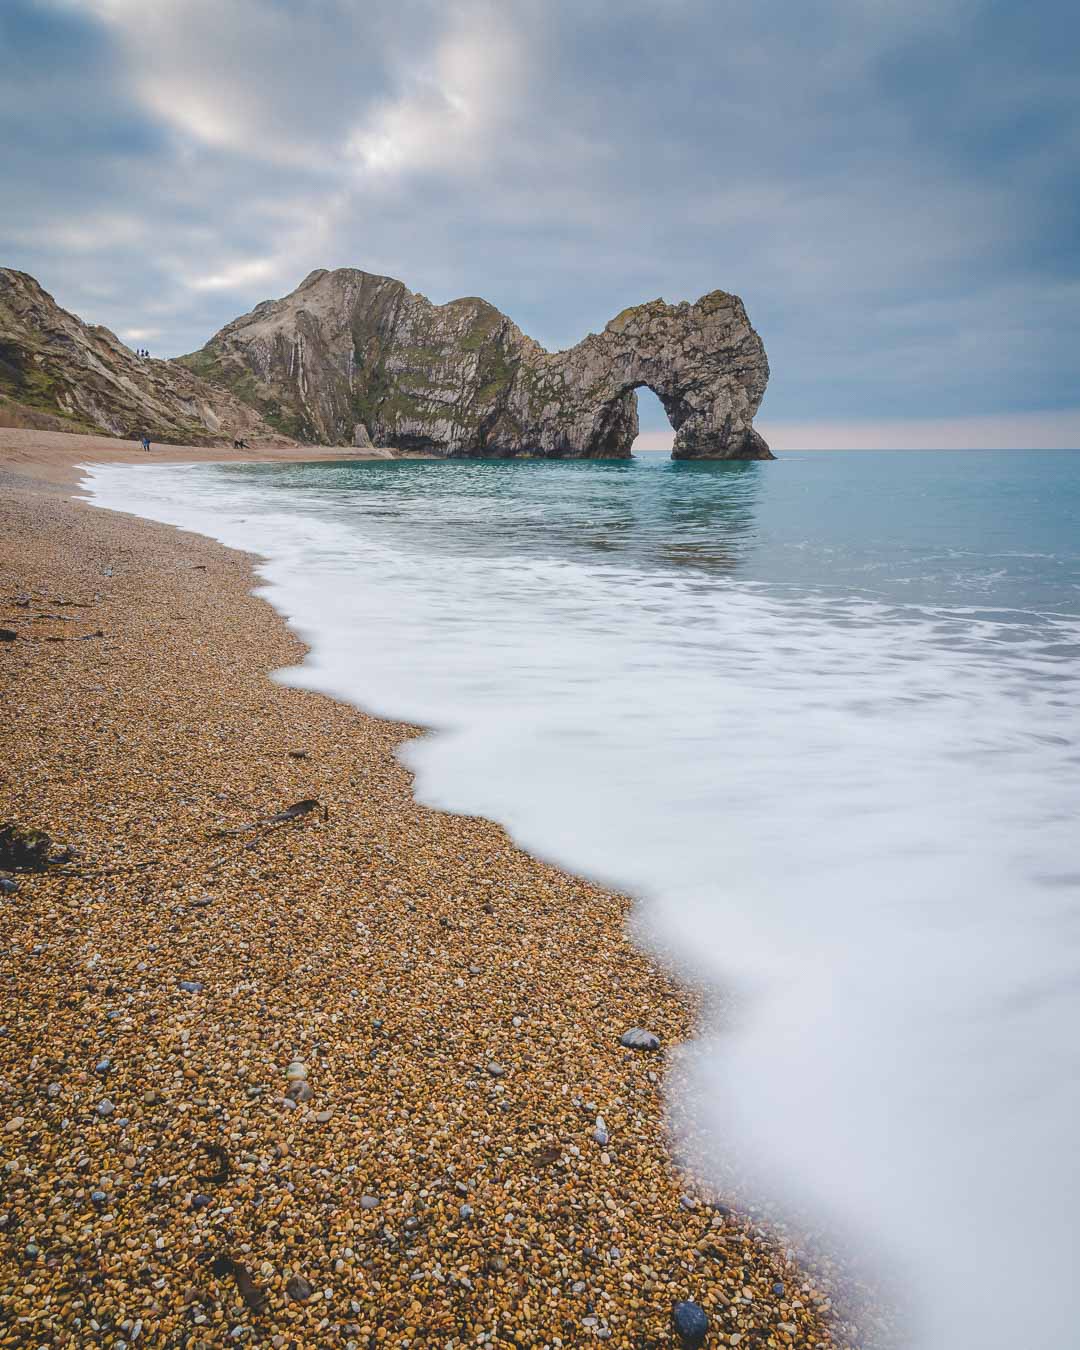
For this shot of Durdle Door, I wanted to show the place from a different perspective than the one I took from above with the drone. To do this, I set up my tripod on the beach, close to the ground.
I also positioned the sky on the upper line of thirds.
I wanted the fading waves to lead the viewer’s eye to the background of the image, diagonally, starting from the bottom right of the image and going to the top left. When shooting, I used a low aperture (f/20) to allow for a long shutter speed (1/5th sec), which made the waves look silky smooth.
Finally, I chose to include people in my shot, to give a sense of scale (can you spot the tiny humans in the image?)
Raw Photo
You can see below the image straight out of the camera.

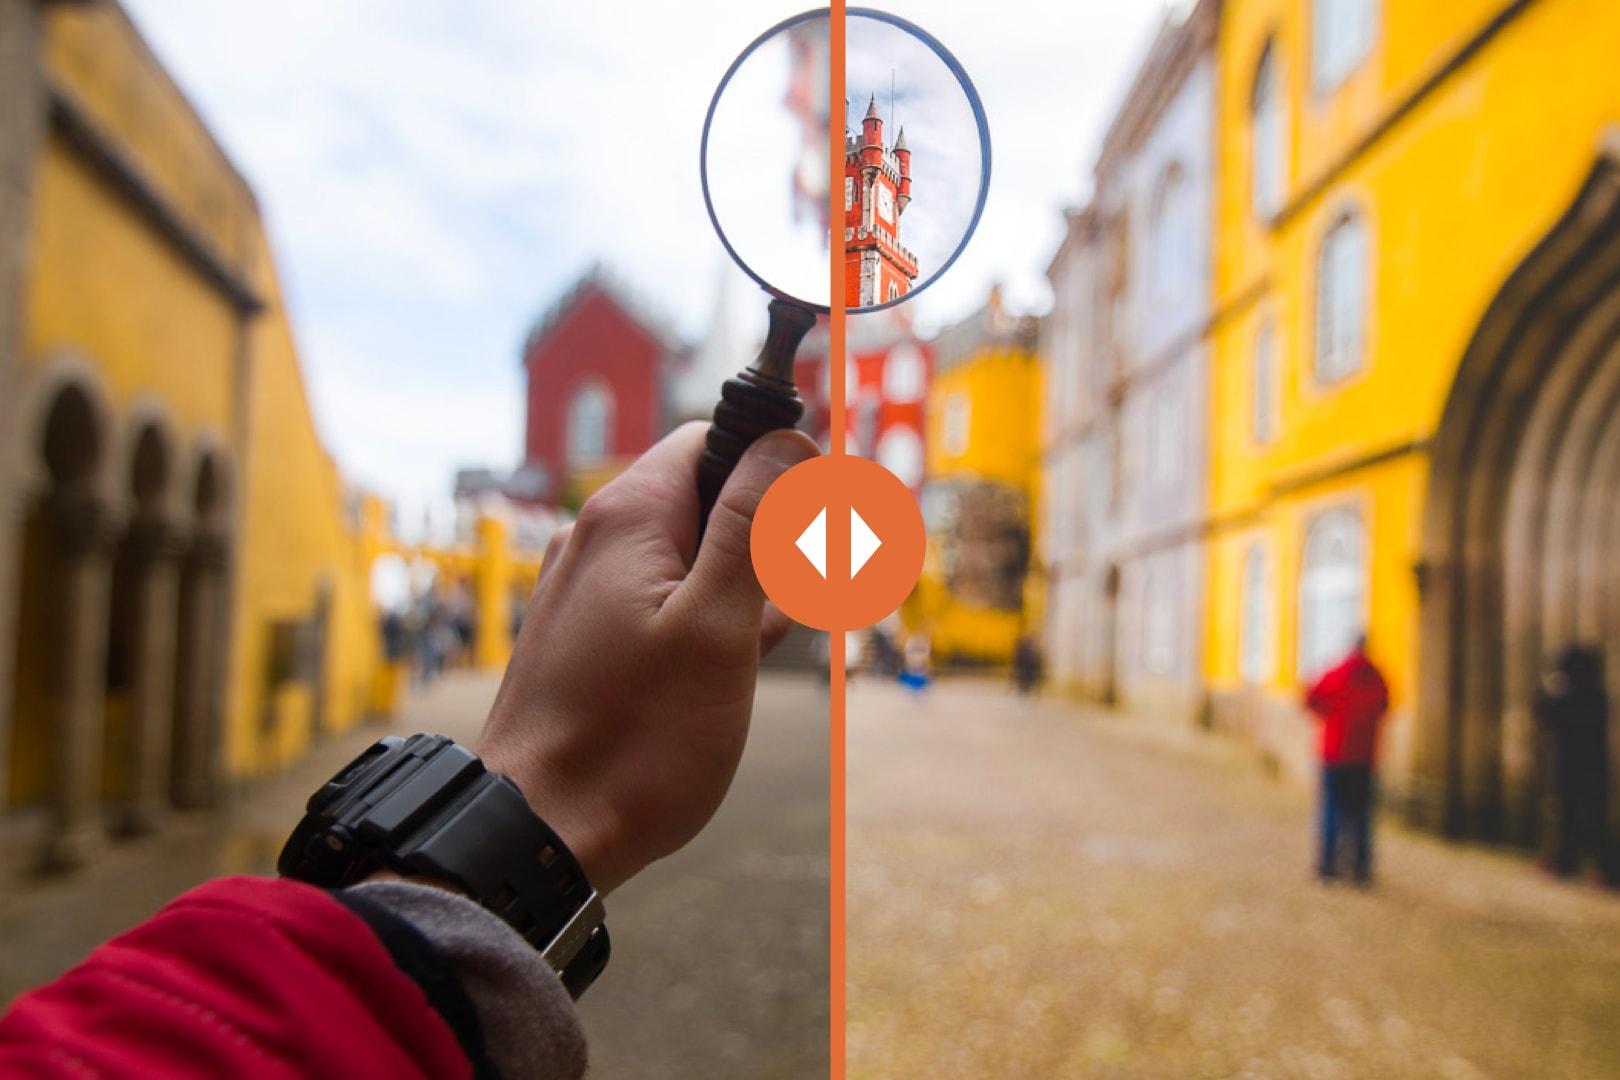
Before/After
Tap on the photo to see the before/after
Editing
After pulling the shadows to make the image brighter, I noticed that the beach had very strong colors. It was stealing all of the attention in the photo.
To correct that, I decreased the saturation and vibrance a tad in the overall picture, to give it this soft look.
The most important edit done to this picture, to me, is the graduated filter I used on the sky to make it more dramatic (decreased highlights, increased whites, added saturation)
And that concludes this episode of Behind the Scenes. I hope that you enjoyed learning more about how I took the image, from the gear used to the editing process.
Most of all, I hope you will be able to use that information for your own photos, and that it will help you improve your photography.
As always, feel free to ask me any questions you have by leaving a comment below (I always reply).

Pin this to Pinterest!
Enjoyed this guide? Then help a fellow traveler and pin it! They'll most definitely love you for it, 100% guarantee.