Understand Exposure and Get It Right Every Time
Exposure is one of the basics of photography, and understanding what it is and how it works is one of the first step in your digital photography journey. The exposure of a photo determines how light or how dark the photo will be; you can control this with 3 main settings in your camera: shutter speed, aperture, and ISO, also known as the exposure triangle.
As you might know if you’ve read some of my other posts, or my About Page, I tend to aim for non-technical and easy to grasp practical information, to help you learn more about photography. Thus, in this post, we won’t go really deep regarding technical explanations, but rather focus on what you need to know to make it work.
TABLE OF CONTENTS
Understand Exposure
So basically, the exposure of a photograph is the amount of light in the photo: it determines how light or how dark the picture is.
A photo can be:
- underexposed: the photo is too dark, and you lose details in the shadows
- overexposed : the photo is too bright, and you lose details in the highlights
- correctly exposed : the photo was taken using the full dynamic range of the camera, and you have good details in both highlights and shadows.
When taking a shot, you generally want it to be “correctly” exposed, avoiding “crushed blacks” and “blown-out highlights”, to ensure you get maximum details in your picture.
From left to right: underexposed, overexposed and correctly exposed.
Tip: If you ever have to choose between getting the details in the shadows or details in the highlights, choose getting details in highlights. Digital cameras are better at recovering details in shadows, and you’ll be able to recover a lot in post-processing. It is way harder with blown-out highlights, as there isn’t any information at all.
(Keep in mind that this is the general rule for exposition; for creative purposes, you might want to deliberately overexpose or underexposure your images)
To get the exposure you want, you can adjust 3 settings: the shutter speed, the aperture, and the ISO.
Each of these settings affect exposure in a specific way:
- shutter speed: sets the duration of the exposure
- aperture: control how much light gets in the camera
- ISO: changes how sensitive your camera sensor is to light
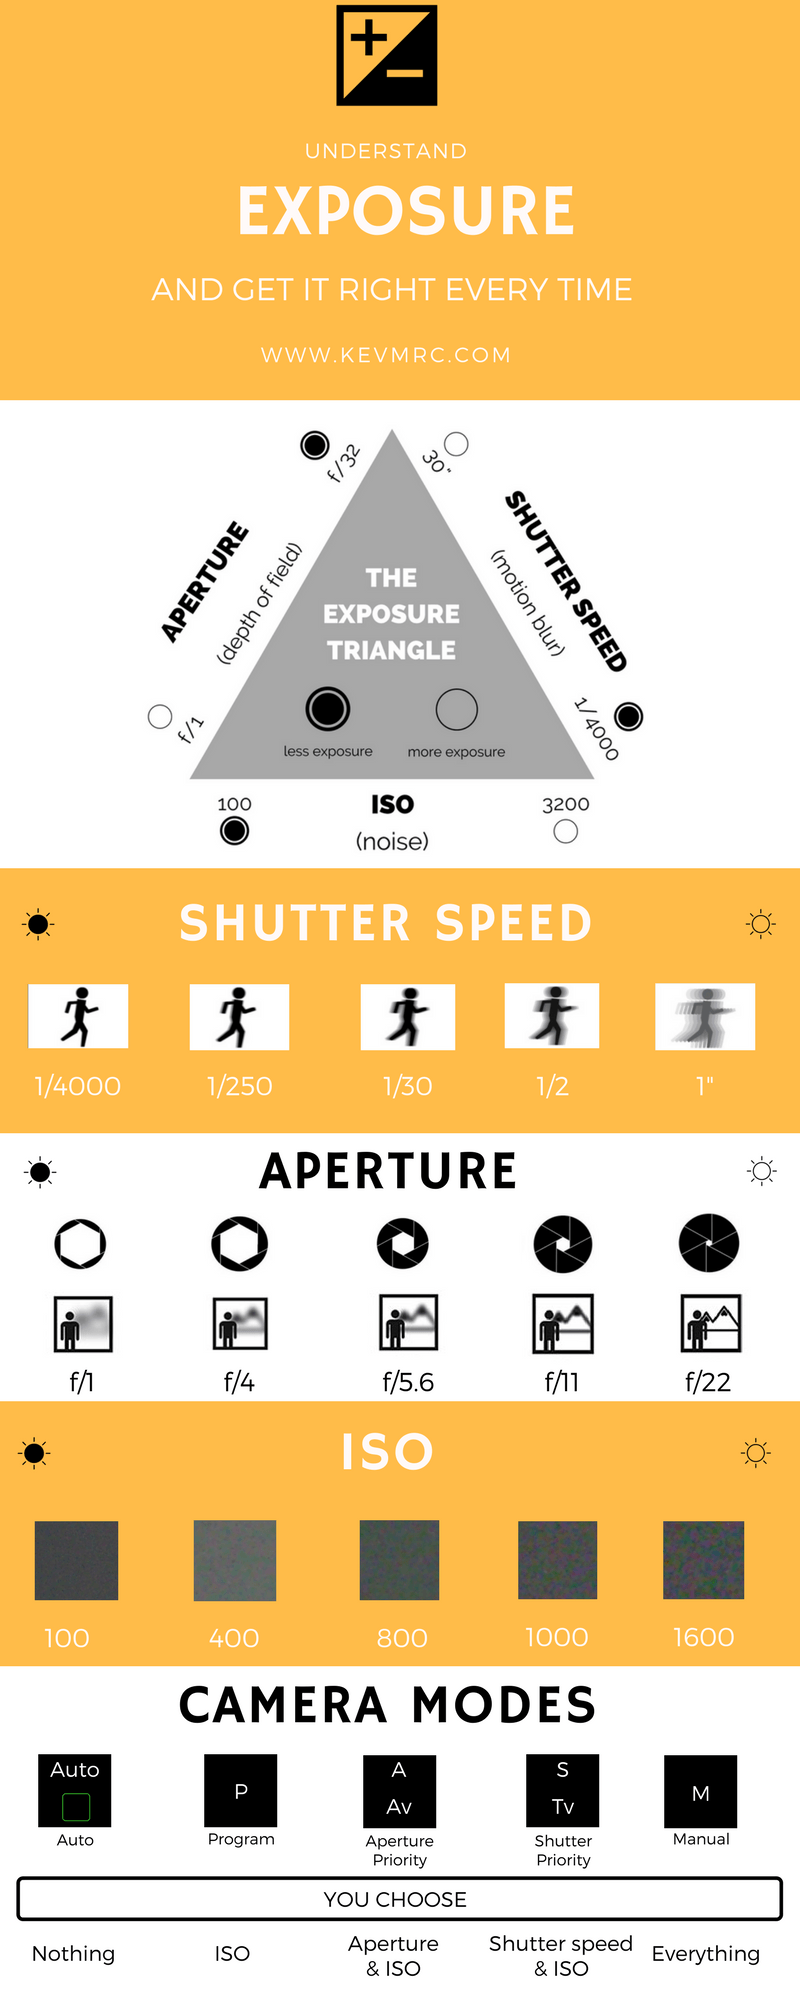
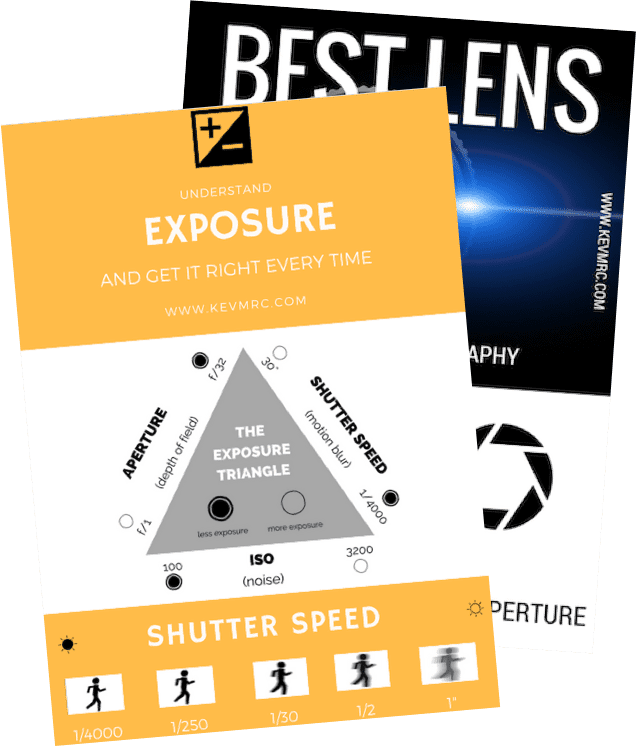
Exposure is often represented by the Exposure Triangle:
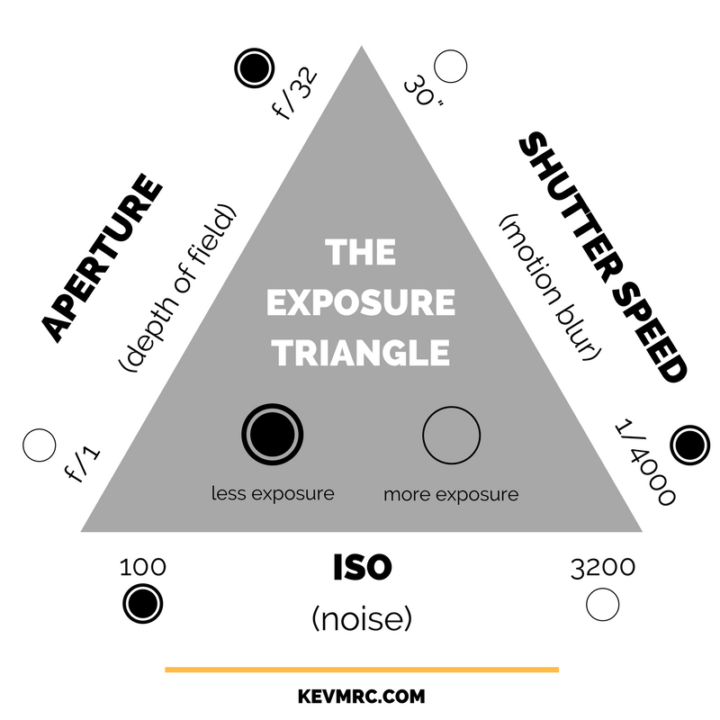
As you can see, you can change any of these 3 settings to achieve the exposure you want. Which one you adjust will mostly depend on what type of photography you’re after, as shutter speed, aperture and ISO all have effects on the picture:
- shutter speed controls motion blur
- aperture controls depth of field
- ISO controls image noise
Let’s go over each one and understand how they work.
Shutter Speed
The shutter speed controls how long the sensor is going to be exposed to light; in other words, a fast shutter speed means the camera will take the picture quickly, whereas a slow shutter speed means the camera will take the picture slowly.
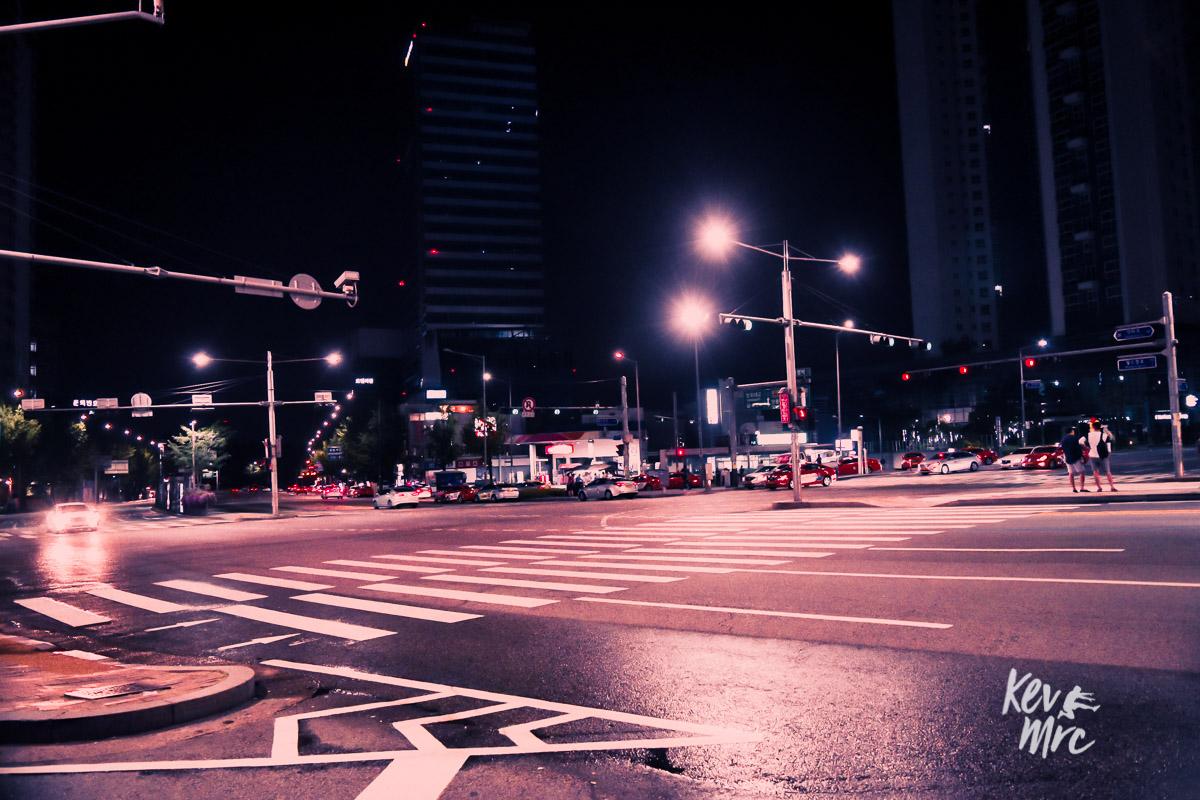
The shutter speed you’ll need to use for a shot depends on what you’re trying to capture: if you want to freeze a fast action, you need a fast shutter speed (1/250 to 1/4000 second); if you want to capture lights at night, or add a silky look to moving water, use a slow shutter speed (1/2 to 30 seconds).
Keep in mind that if you go for a shutter speed slower than 1/30 seconds, you’ll have trouble getting a sharp image. Read more here on How to get sharp images without using a tripod
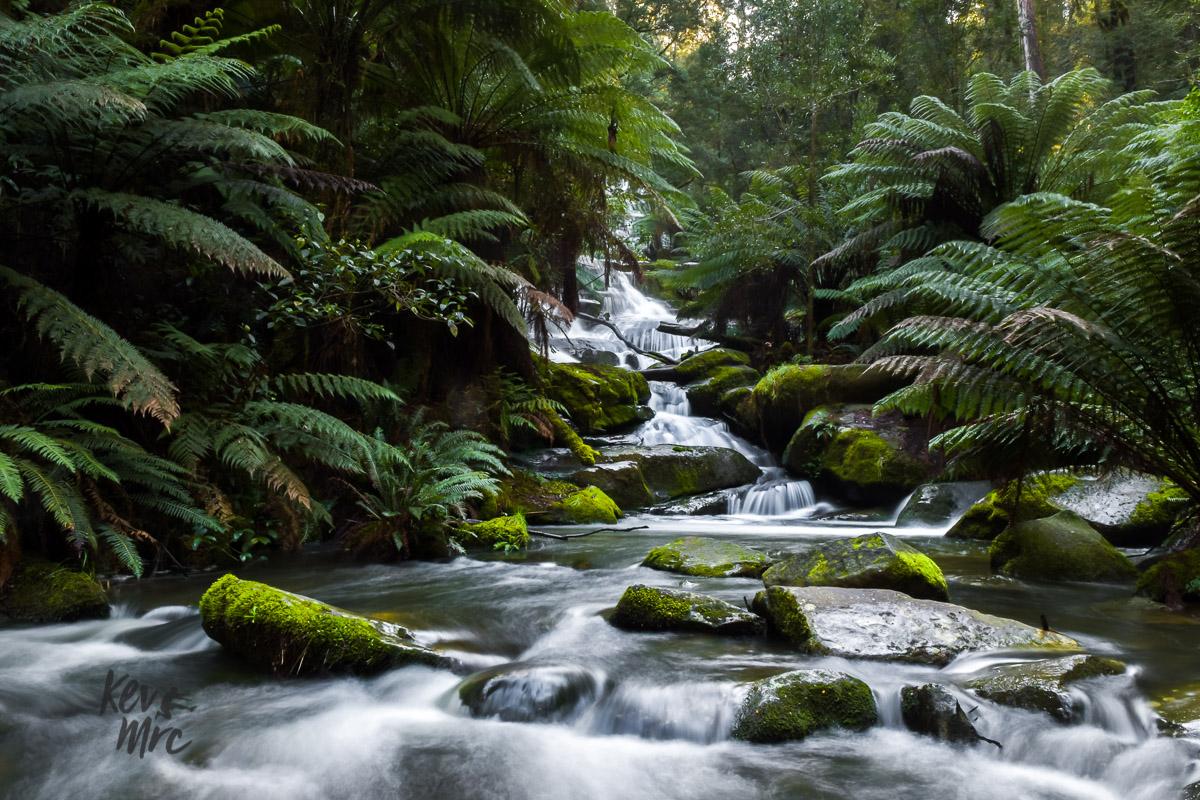
For the waterfall picture, I used a slow shutter speed of 2 seconds. This allowed me to add a silky effect to the water with motion blur.
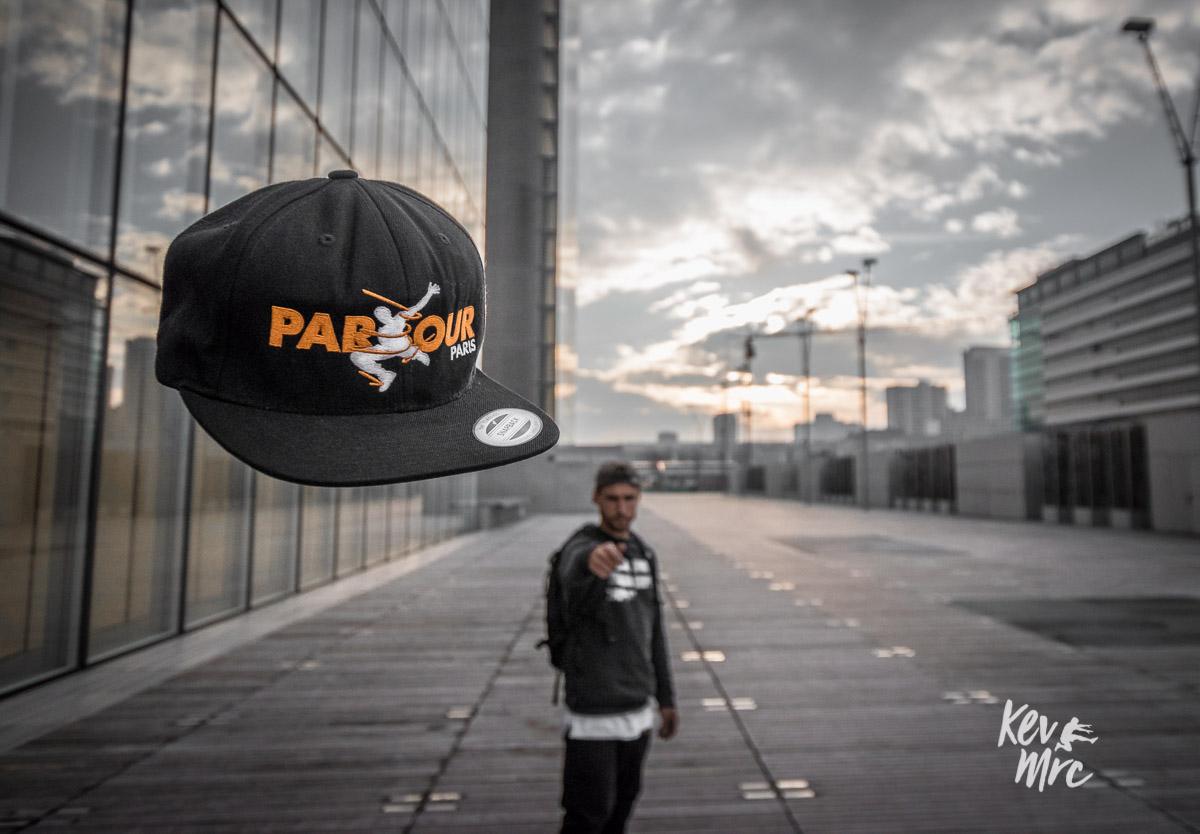
For the action shot, I used a fast shutter speed of 1/4000 seconds, allowing me to freeze the snapback mid air.
Aperture
The aperture controls how much light is entering the camera by opening or closing the lens.
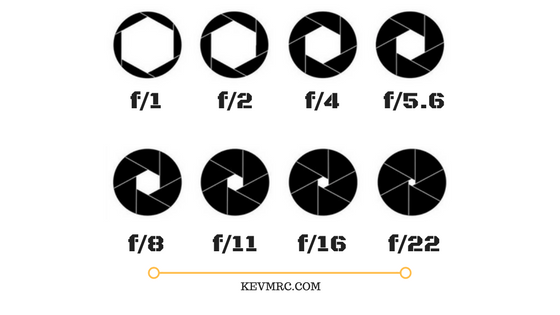
Aperture is defined by f-stops. It can get confusing, but remember that: “the higher the number, the less light that enters.”
A f-stop of f/1.4 means the lens is wide open and a lot of light gets in.
A f-stop of f/22 means the lens is closed and almost no light gets in.
The aperture also controls depth of field (the range of distance at which subjects are sharp).
There are 2 mains depth of field:
- shallow depth of field: only a small portion of the image will be sharp
- large depth of field: the whole image will be sharp
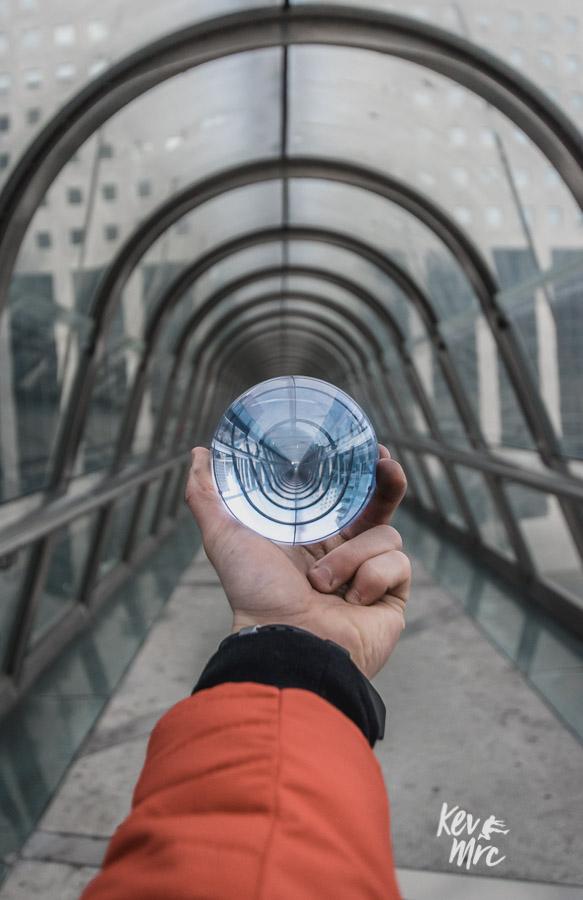
For the shot with the crystal ball, I used a low f-stop number of f/3.5, to achieve a shallow depth of field and get only the hand and crystal ball in focus.
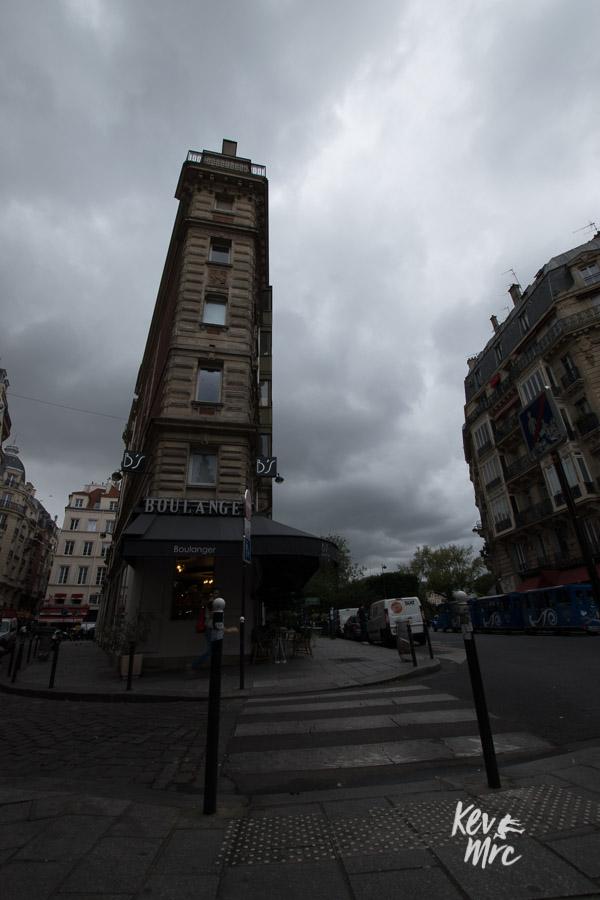
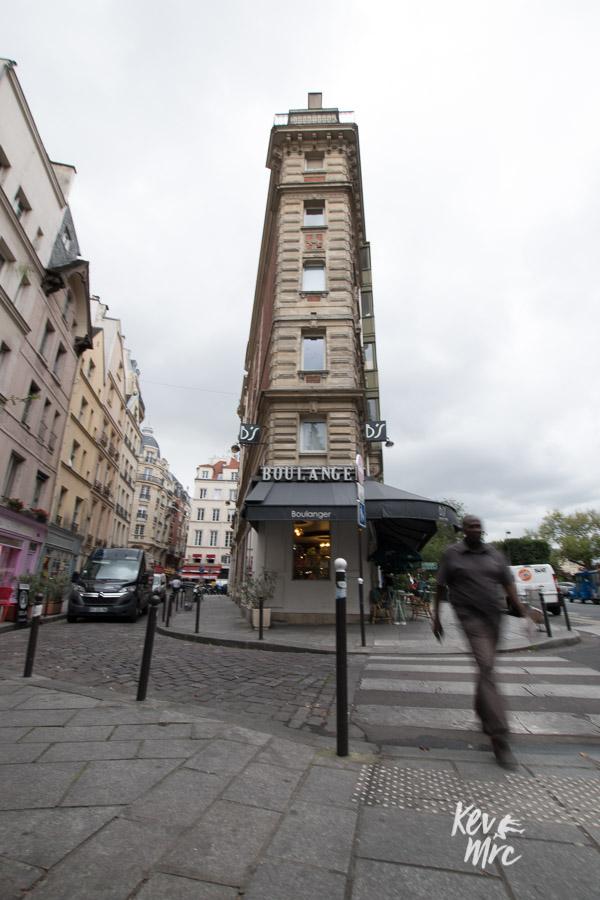
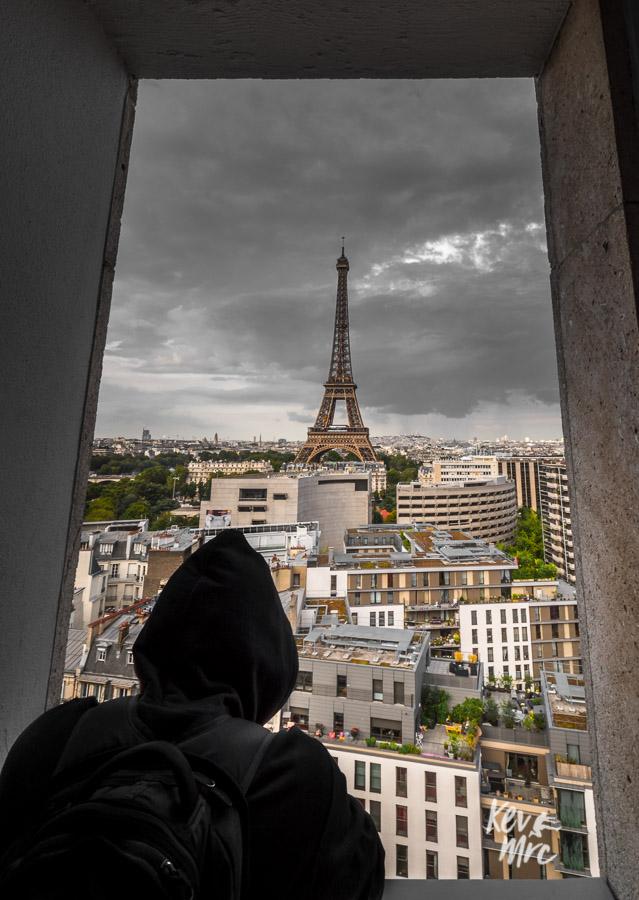
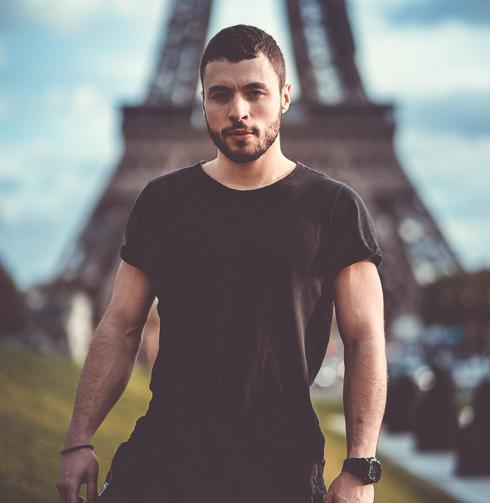
For the shot with the subject posing in front of the Tour Eiffel, I used f/14 to make sure everything was in focus.
If you want to achieve a shallow depth of field, use a low f-stop number.
For a large depth of field, use a high f-stop number.
ISO
ISO stands for International Organization for Standardization, the organization responsible for setting the standards.
The ISO controls how sensitive the camera is to light. The higher the value, the more sensitive to light.
If you’re trying to take a picture in low-light conditions, you can bump up your ISO. And if you’re taking a picture in broad daylight, a low ISO of 100 is enough.
As for shutter speed and aperture, ISO also has an effect on the photo. The higher the ISO number, the more grain you will have on the picture.

Here you can see what happens when you push your ISO too high (ISO 1600 in this case).
For this reason, it is generally best to keep your ISO low, except for situations where you can’t tweak shutter speed/aperture.
Each camera has different low-light performance, and you’ll start to notice grain on different ISO for different camera.
On some, you’ll start to see grain at ISO 640, whereas on some other cameras you’ll only start to notice grain at ISO 1600.
Check out your camera guide or online specs for more info on your specific model.
So there you have it, the 3 ways you can control exposure in your camera: shutter speed, aperture, and ISO.
If you want more light in your picture, you can either:
- use a slower shutter speed
- use a lower f-stop number
- or use a higher ISO
And inversely.
Now that you know how to control your exposure, how do you decide which settings to change? Well, it depends on what you’re trying to capture.
Get the Exposure Right
A general rule of thumb I’m following when shooting is deciding what I’m trying to achieve when taking the picture, and adjusting the settings accordingly.
Regarding exposure, the questions I’m asking myself are the following:
- Am I trying to freeze a fast action? Or trying to get motion blur?
- Do I want everything in focus? Or do I want to draw attention to something specific?
By answering these questions you’ll know which settings you need to change in your camera. And, as we saw with the exposure triangle, shutter speed, aperture and ISO all control exposure, so if you decide on one setting you want to use, then you have leeway on the other two.
Let’s break it down and answer each of the questions, to see how you’ll tweak your settings when shooting.
Freeze fast action or motion blur
Fast action: use a fast shutter speed, from 1/250 to 1/4000 seconds
Because you’re using a fast shutter speed, light will enter your camera for only a short time, meaning you need to tweak the other settings to get more light. You can use a lower f-stop number, or if you want everything in focus, use an higher ISO.
Motion blur: use a slow shutter speed, from 1/2 to 30+ seconds.
Light will enter your camera for a long time; in order to avoid overexposure, you’ll need to use an higher f-stop number, or if you’re trying to focus only on a specific subject, use a lower ISO.
Everything in focus? Or only a specific subject
Everything in focus: use a high f-stop number, from f/8 to f/22 depending on your lens
There isn’t a lot of light entering the camera, so you’ll need to make sure you get more light: use a slower shutter speed, or an higher ISO.
Specific subject: use a low f-stop number, from f/1.4 to f/5.6
To compensate for all the light entering the camera, use a faster shutter speed or a lower ISO.
By answering these questions before shooting, you’ll know the main setting you need to use; then, you’ll be able to adjust the other two accordingly.
This simple process has made it effortless for me to choose the correct settings for exposure when shooting.
It all comes down to deciding on one setting and adjusting the others. In some situations, you might find you need to set 2 settings in a specific way, often shutter speed and aperture, and that leaves you with ISO.
For example, if you want to freeze a bird mid-aid, while focusing only on the bird and having the background blurry, you’ll need to use a fast shutter speed for the action shot, and a low f-stop number for a shallow depth of field. This means that you’ll have to adjust the last of the 3 settings, ISO, to get a correct exposure for the shot.
Camera modes
Most advanced digital cameras have shooting modes that make it really easy to get the perfect settings for correct exposure.
We’ll quickly go over the main exposure modes and explain how they work.
- Auto/Green Square logo: The automatic mode on your camera; the camera does all the work, and you can’t change any of the exposure settings.
Similar to taking a picture on your smartphone, with no option to control what kind of picture you want to get
- Program/P: the camera chooses shutter speed and aperture; you can only change the ISO and exposure compensation.
- Aperture Priority/Av/A: you choose the aperture and ISO, and the camera will automatically pick the right shutter speed for correct exposure.
Really useful mode, allows you to quickly take a shot while deciding if you want everything in focus or only a specific subject.
- Shutter Priority/Tv/S: you choose the shutter speed and ISO, and the camera will pick the aperture.
Similar to the previous, really useful to quickly take a shot while deciding if you want motion blur or if you want to freeze a fast action.
- Manual/M: you choose all 3 values in your camera.
This option gives you the most control, but it can take time to tweak all 3 settings to take the shot. Often used when you have time to take the shot, such as a landscape photo for example.
These are the main exposure modes for your camera, there might be more depending on your make & model.
If you want to be quick & efficient, you can use aperture priority or shutter priority depending on if you want to choose the depth of field or the motion blur, respectively.
If you have time to take the shot, you can use manual mode to have full control on the settings.
I recommend shooting in Aperture Priority for beginners, as it allows you to quickly be able to take correctly exposed pictures, and to familiarize yourself with your camera settings. I still shoot in Aperture priority mode most of the time, except for when shooting night pictures or waterscapes.
Now last thing I want you to know is that when using the different exposure modes, your camera will pick the settings to achieve correct exposure based on its metering system. The metering system, or how the camera decides what is proper exposure, can be wrong at times, and it’s good to know how you can fix it by switching to manual mode for example or tweaking the settings to correct the exposure.
Know your camera, but don’t solely rely on it. You are the photographer. Take control.
Before You Go
I’ve made a super detailed infographic for choosing the best settings when shooting and even more photography documentation. You can save them all on your phone and have them with you. Fill the form below:
Get my FREE Photo Resources
Need help perfecting your photos? I've created step-by-step guides and compiled all my tips in a folder that I'm giving you free access to, to help you become a better photographer. Get it straight to your inbox now!
No spam, unsubscribe anytime.
Did you find this helpful? Do you have any other tips for getting perfect exposure? Let me know in the comments!

Pin this to Pinterest!
Enjoyed this guide? Then help a fellow traveler and pin it! They'll most definitely love you for it, 100% guarantee.

Thank you so much for this great article Kevin, I’ll definitely keep some of your advice in mind the next time I’m using the camera! 🙂
You’re very welcome Ingmar, glad to know you found it useful!
I am an incredibly amateur photographer, so this is really helpful! I know nothing about exposure!
I’m still learning myself! Well hopefully you know a bit more about it now! Make sure to click on the button at the end of the post for the free resource, it’s a detailed infographic summing up everything you need to know about exposure 😉